Your Guide To Perfectly Winged Liner

Oh, how I love winged liner. It’s my standard, my go-to look, and it has been for years. Thankfully, I’ve come a long way since I was 13 and mimicking the Eye of Horus with a dull, blunt pencil!
Did you know that the ancient Egyptians used a mineral called galena to line their eyes? They believed that cosmetics had magical powers, and that you had to line your eyes with kohl in order to move into the afterlife. I’m onboard with this sentiment: who would want to spend an eternity without eyeliner?! Anyway, as you may have noticed, cosmetic technology has made massive strides since then! It has even changed a lot in the last 18 years. (There I go, showing my age!) There’s no excuse to use a worn-down nub of a pencil anymore!
You’ve probably heard about Benefit Cosmetics’ new They’re Real Push-Up Liner. The hype is huge… and with good reason! The liner is a gel formula which hugs your lashes, and it comes with a built-in Accu-Flex™ tip for super-easy application. I love the matte finish on it, and it’s totally waterproof too, which means your look will last all night. Ooh yes, bad girls unite!
Right now, if you buy your tube of They’re Real Push-Up Liner at Macy’s or macys.com, you’ll receive a FREE deluxe sample of They’re Real remover. Hell yes!
I’ve teamed up with Benefit Cosmetics and Macy’s to bring you a few of my tips for getting the perfect winged eye. Listen, learn, and line those babies!
CURL YOUR LASHES AND APPLY MASCARA FIRST!
I like to curl my lashes and apply mascara before I whip out my gel liner. Sometimes, your liner will get stuck on an eyelash curler and come off in little chunks, which is the most annoying thing ever. Start with your lashes first, and then move into eyeliner.
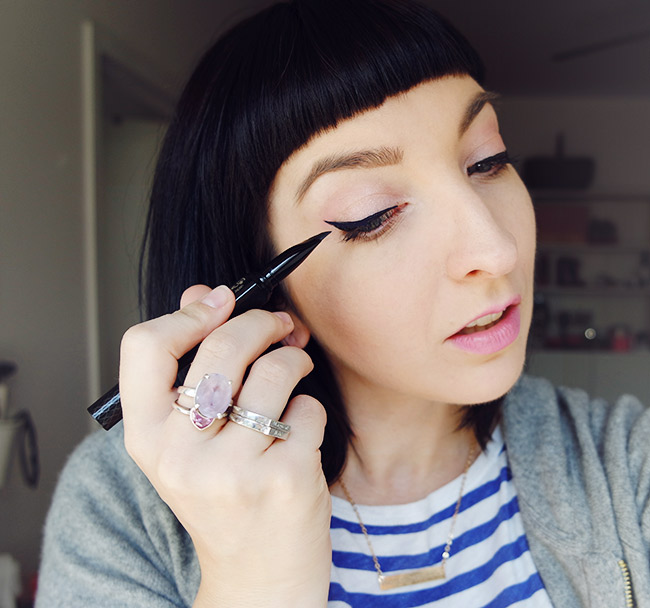
BEGIN WITH THE FLICK
One of the trickiest parts of winged eyeliner is getting it to look even. This can require some finessing. Even if you drew identical outer flicks, you might find it looks a bit skew-whiff, and this could be because your eyes aren’t perfectly symmetrical! Don’t worry if this is the case for you, because it is for me too. My eyes are two different shapes, and one of my eyebrows is a couple of centimetres higher than the other! Never fear: with a little skill, no one will ever know (unless you tell millions of people on the internet, of course!).
Start by drawing one angled line, from the corner of your eye upward. Draw one side, then the other, and then sit back and compare. If they’re not dead right, it’s okay — just wipe them off. They’re Real remover is perfect for this purpose: soak a q-tip and dab it away, then start again. The reason to start with the flick is that then you don’t have to mess up the rest of your liner in the process. Meow!
I also like to lean on something sturdy while I do this. You should always do your makeup in natural light, so set up a little mirror in a window and then lean on the sill while you line your eyes. It makes a huge difference!
ALWAYS FLICK UPWARDS!
I will never forget one of my very best friends telling me, when I was about 14 years old, to flick my eyeliner upwards instead of out to the sides. (We didn’t have Youtube beauty gurus back then. You kids don’t know how lucky you are!) Anyway, the reason for doing this is that winged liner is creating an optical illusion. An angle of about 20 degrees will change the shape of your eye, making you look more flirtatious and coquettish. If you simply draw a straight, horizontal line, your eye will just look… wide. You don’t want that. Flick up, babe!
DOT YOUR LINER
Once your wings are looking wonderful, it’s time to line the rest of your eye. Now, unless you have the steadiest hand in the world, this may end up looking a little irregular. For example, you might have a tendency to go a little heavier on the left than the right, and then when you try to even them out, it just gets worse and worse.
To avoid this scenario, I like to dot or press the tip along my lash line, joining them together slowly. Start with a slim line, and you can build it up slowly. By the way, your liner will look more natural (and professional) if you add a little curve in the middle of your eye. A little arch looks so much better than a straight, flat line — your eyes are not rectangles!
P.S. IF YOU JUST CAN’T GET THE WING RIGHT…
Here are two things to keep in mind. The first is that the angle of the flick should follow the natural curve of your eye. If you press a pen along the arc of your eye, you can easily see the angle your wing should be. If that doesn’t work, an awesome trick is to use a piece of tape as a guide. Yep: just stick it to your face, and trace along the edge with your liner!
DON’T BE INTIMIDATED!
I’ve heard so many people say they’re terrified of liquid liner, and that is, quite frankly, silly. It’s only makeup, and if you really make a mess, you can simply take it off and start again! Learning how to create the perfect wing is a little bit of a learning curve, but it is so worth it, because it looks so damn good! And now with Benefit’s They’re Real Push-Up Liner, it helps make lining eyes that much easier!
GOOD NEWS, EVERYONE!
I’m giving you the chance to practice your liner skills, because I’m giving away a tube of They’re Real Push Up Liner to one lucky reader! (Your crush doesn’t stand a chance.) All you have to do is comment on this post and tell me your best makeup trick. I’ll pick a winner at random next week!
Winged liner for life,

This post was brought to you by Benefit Cosmetics and Macy’s. Holler!